
As the chilly winds of winter creep in, many gardeners turn their attention to preserving the health of their plants. One often-overlooked genius trick is winter mulching, a technique that not only guards against frost damage but also enriches garden beds in unexpected ways. Instead of reaching for compost or fertilizer, this mulch hack offers a cost-effective, straightforward approach to enhancing soil health during the cold season.
By simply applying organic materials as a protective blanket over the earth, gardeners can promote soil protection, retain moisture, and foster nutrient-rich conditions. While most may think of mulching as a summer task, preparing your garden beds now can make an incredible difference for the next growing season. This article delves into the benefits of winter mulching, the best materials to use, and a step-by-step guide to ensure your plants are well-tended through the frost.
Understanding the Benefits of Winter Mulching
Winter mulching acts as an insulating layer for garden beds, minimizing potential damage from freezing temperatures and harsh weather. This method not only helps keep the roots warm but also dampens the effects of fluctuating weather conditions. Here’s why this practice is indispensable:
- Prevents weed growth: A good layer of mulch suppresses the emergence of winter-hardy weeds that can deplete your soil’s nutrients.
- Maintains soil temperature: Insulation provided by the mulch helps to keep the soil temperature steady, protecting plant roots from the freeze-thaw cycle.
- Reduces erosion: Mulch lessens soil erosion caused by rain or melting snow, ensuring your garden maintains its structure.
- Enhances soil structure: Over time, organic mulch breaks down, enriching the soil and improving its texture and aeration.
Best Materials for Winter Mulching
When it comes to selecting mulch, it’s easy to get overwhelmed. Fortunately, there’s a plethora of organic materials perfect for winter mulching. Consider these options:
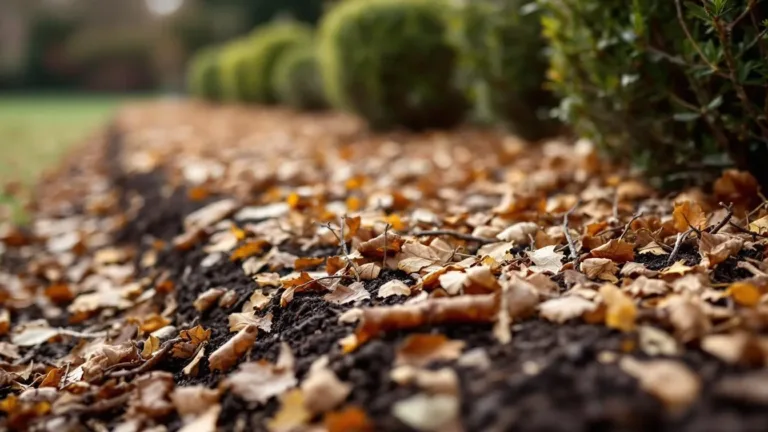
- Shredded leaves: A free and effective choice, leaves break down to enrich the soil over time.
- Pine needles: Excellent for acid-loving plants, these needles decompose slowly and form a solid barrier against weeds.
- Wood chips: Ideal for suppressing weeds while holding moisture in the soil, budget-conscious gardeners will appreciate their affordability.
- Grass clippings: Easily available, ensure they’re free of herbicides before use.
Timing Your Winter Mulching
Knowing when to apply mulch is crucial. It’s recommended to wait until after the first hard frost; this timing ensures that the soil has cooled and prevents any trapped heat from worsening damage to roots. Be wary, however, as mulching too late can hinder the effectiveness of this practice.
Step-by-Step Winter Mulching Process
Implementing winter mulching involves a few straightforward steps:
- Clear the area: Remove any dead plants and debris to welcome fresh mulch.
- Weed control: Ensure that any persistent weeds are dealt with before applying mulch.
- Apply the mulch: Spread a 2- to 3-inch layer over the garden beds, but keep it thinner around the base of plants to prevent rot.
Spring Clean-Up
As winter fades and spring approaches, it’s important to start removing some of the mulch. This process prevents the soil from becoming overly compacted and ensures that new growth can emerge unhindered. Recycle the old mulch by adding it to a compost pile for ongoing garden benefits. Winter mulching not only prepares the garden for colder months but also sets the stage for thriving growth in the spring.